わんぱく Flutter! 第六回 iBeacon で二酸化炭素測定っ!

今回は、iBeacon の二酸化炭素濃度測定機を読み取ります。測定機も、市販のものではなく、この為に MH-Z19C センサーを用いた専用のハードウェアを作成します。センサー側の解説は、下記ウェブサイト(こちらのウェブサイトは、このウェブサイトと連携しており、同じく私が書いています)から、お読み下さい。順番としては、ハードウェア作成が先になりますが、こちらの Flutter の解説を読んでからでも構いません。

1. デフォルトプロジェクトの作成
いつものように、まず、デフォルトの Flutter プロジェクトを作成します。

2. パッケージの設定
今回は、flutter_blue_beacon パッケージと、flutter_blue パッケージを利用します。 下記のように pubspec.yaml にこの 2つを追加して、pub get します。
dependencies:
  flutter:
    sdk: flutter


  # The following adds the Cupertino Icons font to your application.
  # Use with the CupertinoIcons class for iOS style icons.
  cupertino_icons: ^1.0.2
  flutter_blue_beacon: ^0.0.2
  flutter_blue: ^0.5.0
このパッケージは、minSdkVersion が 19 以上となっているので、app レベルの build.grade の minSdkVersion を 19 に変更しておきます。そして、今回は targetSdkVersion を 28 として作成します。同様に、compileSdkVersion も 28 に変更します。
android {
    compileSdkVersion 28

    defaultConfig {
        // TODO: Specify your own unique Application ID (https://developer.android.com/studio/build/application-id.html).
        applicationId "systemquality.flutter_ibeacon"
        minSdkVersion 19
        targetSdkVersion 28
        versionCode flutterVersionCode.toInteger()
        versionName flutterVersionName
    }
また、プロジェクトを build してみると、"protobuf" 関連でエラーとなる為、プロジェクトレベルの build.grade に protobuf 関連 classpath を一つ追記しておきます。
buildscript {
    repositories {
        google()
        jcenter()
    }

    dependencies {
        classpath 'com.android.tools.build:gradle:4.1.0'
    }

    dependencies {
        classpath 'com.google.protobuf:protobuf-gradle-plugin:0.8.13' // <== これです。
    }
}
3. プログラムの作成
今回も、デフォルトで作成された main.dart を修正する形で開発します。 やはり、さほど大きくはなりませんので、以下に main.dart 全文を記載します。
import 'package:flutter/material.dart';

import 'dart:async';                                       // <== この3行を追加
import 'package:flutter_blue/flutter_blue.dart';
import 'package:flutter_blue_beacon/flutter_blue_beacon.dart';

void main() {
  runApp(MyApp());
}

class MyApp extends StatelessWidget {
  // This widget is the root of your application.
  @override
  Widget build(BuildContext context) {
    return MaterialApp(
      title: '二酸化炭素濃度 Beacon',                         // <== Title を変更
      theme: ThemeData(
        // This is the theme of your application.
        //
        // Try running your application with "flutter run". You'll see the
        // application has a blue toolbar. Then, without quitting the app, try
        // changing the primarySwatch below to Colors.green and then invoke
        // "hot reload" (press "r" in the console where you ran "flutter run",
        // or simply save your changes to "hot reload" in a Flutter IDE).
        // Notice that the counter didn't reset back to zero; the application
        // is not restarted.
        primarySwatch: Colors.blue,
      ),
      home: MyHomePage(title: '二酸化炭素濃度 Beacon'),        // <== Title を変更
    );
  }
}

class MyHomePage extends StatefulWidget {
  MyHomePage({Key key, this.title}) : super(key: key);

  // This widget is the home page of your application. It is stateful, meaning
  // that it has a State object (defined below) that contains fields that affect
  // how it looks.

  // This class is the configuration for the state. It holds the values (in this
  // case the title) provided by the parent (in this case the App widget) and
  // used by the build method of the State. Fields in a Widget subclass are
  // always marked "final".

  final String title;

  @override
  _MyHomePageState createState() => _MyHomePageState();
}

class _MyHomePageState extends State<MyHomePage> {

  String message = 'starting...';               // <== ここから initState() まで追加

  FlutterBlueBeacon flutterBlueBeacon = FlutterBlueBeacon.instance;
  FlutterBlue _flutterBlue = FlutterBlue.instance;
  IBeacon iBeacon;

  StreamSubscription _scanSubscription;
  Map<int, Beacon> beacons = new Map();

  BluetoothState state = BluetoothState.unknown;

  @override
  void initState() {                            // <== initState() 追加
    super.initState();

    _flutterBlue.state.then((s) {
      setState(() {
        state = s;
      });
    });

    _stateSubscription = _flutterBlue.onStateChanged().listen((s) {
      setState(() {
        state = s;
      });
    });

    _startScan();
  }

  _startScan() {                                // <== _startScan() 追加
    IBeacon ib;
    double temp;
    double dist;
    double co2;

    print("Scanning now");
    _scanSubscription = flutterBlueBeacon
        .scan()
        .listen((beacon) {
      print('localName: ${beacon.scanResult.advertisementData.localName}');
      print('manufacturerData: ${beacon.scanResult.advertisementData.manufacturerData}');
      print('serviceData: ${beacon.scanResult.advertisementData.serviceData}');
      print('tx: ${beacon.tx}');
      print('rssi: ${beacon.rssi}');
      print('distance: ${beacon.distance}');

      ib = beacon;

      if(ib.uuid == "df19e9a46f0d4c4aa104e7ddd31a4ab5") {
        print('uuid: ${ib.uuid}');
        print('major: ${ib.major}');
        print('minor: ${ib.minor}');
        print('rssi: ${ib.rssi}');
        print('distance: ${ib.distance}');

        temp = (ib.major).toDouble();
        co2 = (ib.minor).toDouble();
        dist = (ib.distance * 1000).toInt() / 1000;

        message = "気温:${temp} [℃]\nCO₂濃度:${co2} [ppm]\n距離:${dist} [m]";
      }

      setState(() {
        beacons[beacon.hash] = beacon;
      });
    });

  }

  @override
  Widget build(BuildContext context) {
    // This method is rerun every time setState is called, for instance as done
    // by the _incrementCounter method above.
    //
    // The Flutter framework has been optimized to make rerunning build methods
    // fast, so that you can just rebuild anything that needs updating rather
    // than having to individually change instances of widgets.
    return Scaffold(
      appBar: AppBar(
        // Here we take the value from the MyHomePage object that was created by
        // the App.build method, and use it to set our appbar title.
        title: Text(widget.title),
      ),
      body: Center(
        // Center is a layout widget. It takes a single child and positions it
        // in the middle of the parent.
        child: Column(
          // Column is also a layout widget. It takes a list of children and
          // arranges them vertically. By default, it sizes itself to fit its
          // children horizontally, and tries to be as tall as its parent.
          //
          // Invoke "debug painting" (press "p" in the console, choose the
          // "Toggle Debug Paint" action from the Flutter Inspector in Android
          // Studio, or the "Toggle Debug Paint" command in Visual Studio Code)
          // to see the wireframe for each widget.
          //
          // Column has various properties to control how it sizes itself and
          // how it positions its children. Here we use mainAxisAlignment to
          // center the children vertically; the main axis here is the vertical
          // axis because Columns are vertical (the cross axis would be
          // horizontal).
          mainAxisAlignment: MainAxisAlignment.center,
          children: <Widget>[
            Container(                           // <== Container 以下を変更
              decoration: BoxDecoration(
                border: Border.all(color: Colors.green, width: 2),
                borderRadius: BorderRadius.circular(8),
              ),
              padding: EdgeInsets.all(8),
              child: Text(
                message,
                style: Theme.of(context).textTheme.headline4,
              ),
            ),
          ],
        ),
      ),
    );
  }
}
今回も、これだけです。まず、必要な import や、アプリケーションの表題などを適ほど、追加・変更しています。 そして、"_MyHomePageState" class では、必要となる変数の宣言や、インスタンスの作成を行います。
String message = 'starting...';

FlutterBlueBeacon flutterBlueBeacon = FlutterBlueBeacon.instance;
FlutterBlue _flutterBlue = FlutterBlue.instance;
IBeacon iBeacon;

StreamSubscription _scanSubscription;
Map<int, Beacon> beacons = new Map();

BluetoothState state = BluetoothState.unknown;
"message" 変数には、iBeacon から送られてきた測定結果を格納します。そして、"flutterBlueBeacon" と "flutterBlue" のインスタンス作成、送られてきたデータを取り扱うための "IBeacon" class、データを受け取る "StreamSubscription"、複数の iBeacon をハッシュを用いて管理するための "Map" class、Bluetooth の state 管理用 class を準備します。
"initState()" メソッドでは、"flutter_blue" と "StreamSubscription" の state 設定(初期設定)を行い、_startScan() を呼び出しています。
void initState() {
  super.initState();

  _flutterBlue.state.then((s) {
    setState(() {
      state = s;
    });
  });

  _stateSubscription = _flutterBlue.onStateChanged().listen((s) {
    setState(() {
      state = s;
    });
  });

  _startScan();
}
"_startScan()" メソッドでは、必要なオブジェクトや変数の宣言を行った後に、"_scansubscription" で iBeacon をスキャンした結果を listen() つまり、聞き取っています。localname,..rssi,distance 等、聞き取った内容を print() でコンソールにデバッグ出力し、データを取り扱うための class "IBeacon" にセットしています。
_startScan() {
  IBeacon ib;
  double temp;
  double pres;
  double dist;
  double co2;

  print("Scanning now");
  _scanSubscription = flutterBlueBeacon
      //.scan(timeout: const Duration(seconds: 20))
      .scan()
      .listen((beacon) {
    print('localName: ${beacon.scanResult.advertisementData.localName}');
    print('manufacturerData: ${beacon.scanResult.advertisementData.manufacturerData}');
    print('serviceData: ${beacon.scanResult.advertisementData.serviceData}');
    print('tx: ${beacon.tx}');
    print('rssi: ${beacon.rssi}');
    print('distance: ${beacon.distance}');

    ib = beacon;

    if(ib.uuid == "df19e9a46f0d4c4aa104e7ddd31a4ab5") {
      print('uuid: ${ib.uuid}');
      print('major: ${ib.major}');
      print('minor: ${ib.minor}');
      print('rssi: ${ib.rssi}');
      print('distance: ${ib.distance}');

      temp = (ib.major).toDouble();
      co2 = (ib.minor).toDouble();
      dist = (ib.distance * 1000).toInt() / 1000;

      message = "気温:${temp} [℃]\nCO₂濃度:${co2} [ppm]\n距離:${dist} [m]";
    }

    setState(() {
      beacons[beacon.hash] = beacon;
    });
  });//, onDone: _stopScan);

}
つづく if 文では、"ib.uuid" と文字列を比較していますが、この文字列は、今回作成した二酸化炭素濃度測定 iBeacon に固有の ID です。これで iBeacon を識別しています。もし、聞き取った iBeacon が目的の二酸化炭素濃度測定機であれば、温度(temp)、二酸化炭素濃度(co2)、dist(測定機までの距離)を取得して "message" 変数に設定しています。
iBeacon では、この UUID と Major、Minor、RSSI のデータだけ送られてきますが、今回の二酸化炭素濃度測定機では、Major と Minor に温度と二酸化炭素濃度値を格納して送っています。
iBeacon については、下記ウェブサイトに分かり易く説明された資料があるので、お薦めです。
https://pages.rohm.co.jp/dp-make-manual005.html
そして、"build()" メソッドでは、iBeacon から送られてきた値の格納されている "message" を、Text Widget を利用して出力しています。
children: <Widget>[
  Container(
    decoration: BoxDecoration(
      border: Border.all(color: Colors.green, width: 2),
      borderRadius: BorderRadius.circular(8),
    ),
    padding: EdgeInsets.all(8),
    child: Text(
      message,
      style: Theme.of(context).textTheme.headline4,
    ),
  ),
],
準備ができたら、いつものように実行して確認をしますが、今回は冒頭でも説明した通り、二酸化炭素濃度測定用ハードウェアの準備も必要です。そちらの解説から読み進めている方は、一旦、測定機の解説に戻って、読み進めて下さい。 もうハードウェアの準備も終わって、実行するだけだよという方は、実行して確かめてみましょう。
実行すると、以下のように気温と二酸化炭素濃度、そして、iBeacon までの距離が表示されます。
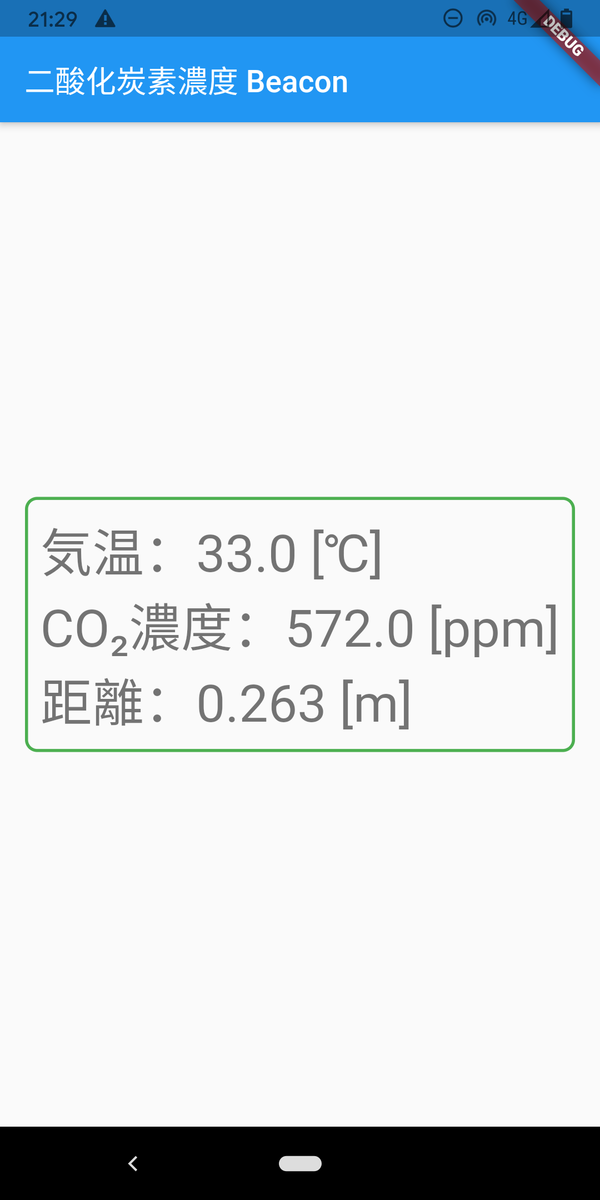
また、この次の記事では、ゲージ Widget を使った、かっこいい表示方法も説明します。
a-software-resources.hatenablog.com
以上