わんぱく Flutter! 第五回 Firebase にログイン!

第四回で画像認識に使用した Firebase ですが、主な機能は機械学習ではなく、〜base と付いているだけあって、データベースが中心のサービスです。今回はその Firebase を使用する為のにログイン機能を組んでみます。 とは言っても、初期化して ID、Password を API に渡すだけですから、簡単です。しかし、Firebase も Flutter のパッケージも日々、更新されていますので、使い方がどんどん変わっています。今回も、最新の情報に気をつけて作成して下さい。この記事は、2021年4月24日の情報を元に執筆しています。
1. Firebase の設定
こちらは、「第四回 いきなりっ! 画像認識をしてみよう。 - 1.Firebase を使えるようにする」を参考に、Firebase のウェブサイトから、新しく Firebase にプロジェクトを作って下さい。或いは、第四回で使用したプロジェクトを流用して、Flutter のプログラムファイル main.dart のファイル名を何か別の名前に変更して、新しく main.dart ファイルを作ってもいいです。
今回は firebase_ml_vision は使用しないので、firebase_ml_vision の API の設定などは必要ありませんが、特にしてあっても問題はありません。気を付けなければならない点としては、Flutter のパッケージ名を Firebase 側の設定と合わせる事と、google-service.json を app レベルに保存しておくことでしょうか。
2. Firebase Authentication の準備
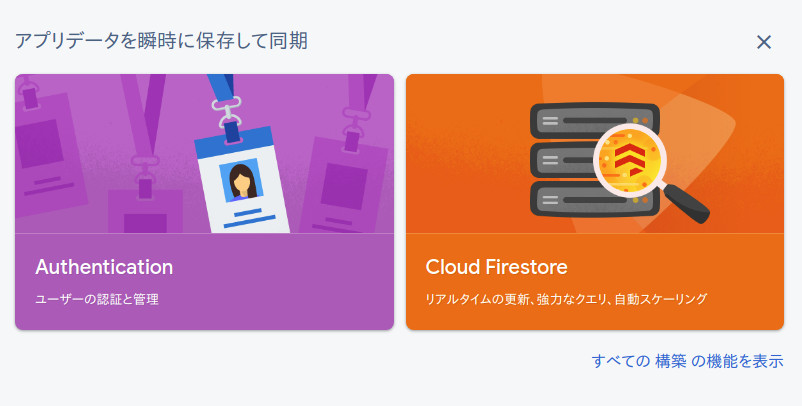
FIrebase の設定が終わったら、Firebase の認証機能を使えるようにします。Firebase のウェブサイトから、今回のプログラムに使用する Firebase のプロジェクトを開いて、"Authentication" をクリックします。
そうすると、「始める」ボタンがあると思いますので、それをクリックして "Authentication" - "Sign-in method" のタブを開きます。
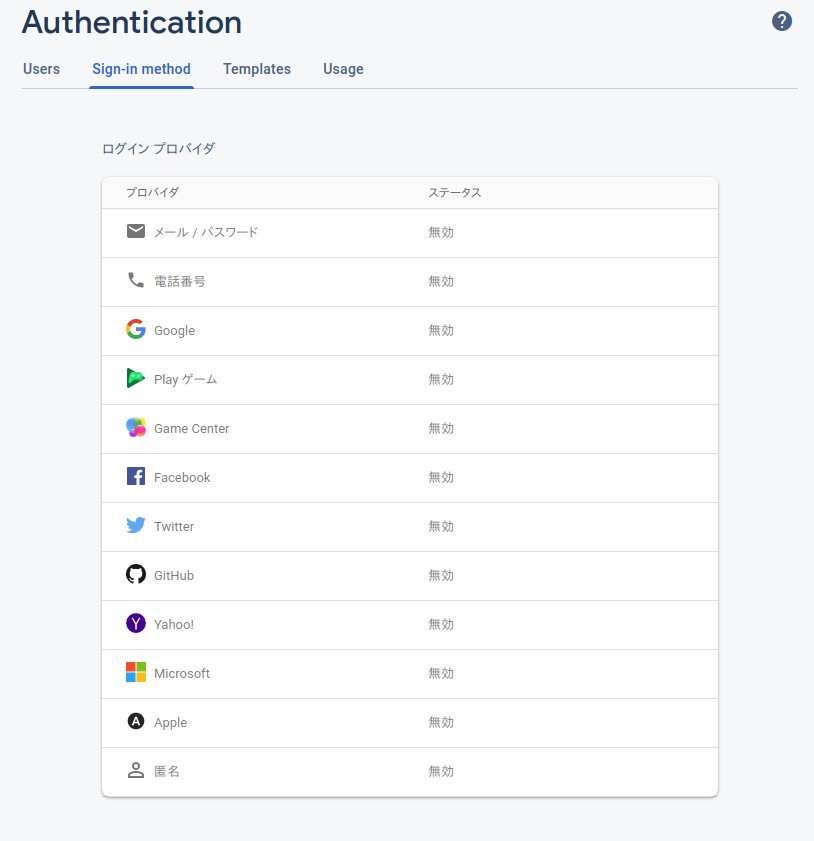
今回は、「メール/パスワード」でのログインを作成するので、一番上のプロバイダ「メール/パスワード」を「有効」にします。

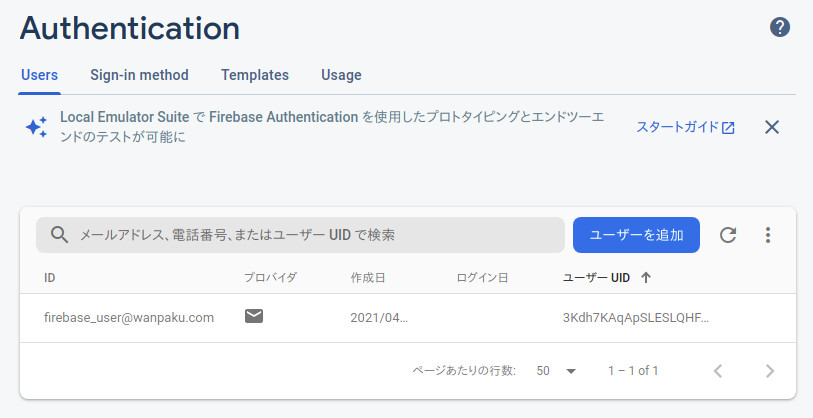
有効にしたら、"Users" タブから新しい「ユーザーを追加」します。メールアドレスとパスワードの組み合わせは、今、ログインしているアカウントではなくても大丈夫です。今回のプログラムで使用するものです。
これで Firebase のウェブサイト側の準備はできました。そうしたら、Flutter のパッケージ firebase_auth: ^1.1.1 を pubspec.yaml に設定して、Pub get して下さい。
dependencies:
  flutter:
    sdk: flutter


  # The following adds the Cupertino Icons font to your application.
  # Use with the CupertinoIcons class for iOS style icons.
  cupertino_icons: ^1.0.2
  firebase_core: ^1.0.3
  firebase_auth: ^1.1.1
ここでも、パッケージのバージョン番号に気を付けてください。2021年4月24日現在では、上記バージョンが最新となっています。
3. Firebase にログインする
AndroidStudio が自動的に作成している main.dart を下記の通り変更します。全文を載せているので、丸々入れ替えてしまっても構いません。
import 'package:flutter/material.dart';
import 'package:firebase_core/firebase_core.dart';   // <== 追加
import 'package:firebase_auth/firebase_auth.dart';   // <== 追加

final FirebaseAuth auth = FirebaseAuth.instance;       // <== 追加

void main() async{       // <== 変更

  WidgetsFlutterBinding.ensureInitialized();        // <== 追加
  await Firebase.initializeApp();             // <== 追加

  runApp(MyApp());
}

class MyApp extends StatelessWidget {
  // This widget is the root of your application.
  @override
  Widget build(BuildContext context) {
    return MaterialApp(
      title: 'login',     // <== 変更
      theme: ThemeData(
        // This is the theme of your application.
        //
        // Try running your application with "flutter run". You'll see the
        // application has a blue toolbar. Then, without quitting the app, try
        // changing the primarySwatch below to Colors.green and then invoke
        // "hot reload" (press "r" in the console where you ran "flutter run",
        // or simply save your changes to "hot reload" in a Flutter IDE).
        // Notice that the counter didn't reset back to zero; the application
        // is not restarted.
        primarySwatch: Colors.blue,
      ),
      home: MyHomePage(title: 'Login'),    // <== 変更
    );
  }
}

class MyHomePage extends StatefulWidget {
  MyHomePage({Key key, this.title}) : super(key: key);

  // This widget is the home page of your application. It is stateful, meaning
  // that it has a State object (defined below) that contains fields that affect
  // how it looks.

  // This class is the configuration for the state. It holds the values (in this
  // case the title) provided by the parent (in this case the App widget) and
  // used by the build method of the State. Fields in a Widget subclass are
  // always marked "final".

  final String title;

  @override
  _MyHomePageState createState() => _MyHomePageState();
}

class _MyHomePageState extends State<MyHomePage> {
  int _counter = 0;

  String USER_ID;                     // <== 追加
  String PASS;                       // <== 追加
  String ErrorMessage = "ログインして下さい。";     // <== 追加

  void _incrementCounter() {
    setState(() {
      // This call to setState tells the Flutter framework that something has
      // changed in this State, which causes it to rerun the build method below
      // so that the display can reflect the updated values. If we changed
      // _counter without calling setState(), then the build method would not be
      // called again, and so nothing would appear to happen.
      _counter++;
    });
  }

  @override
  Widget build(BuildContext context) {
    // This method is rerun every time setState is called, for instance as done
    // by the _incrementCounter method above.
    //
    // The Flutter framework has been optimized to make rerunning build methods
    // fast, so that you can just rebuild anything that needs updating rather
    // than having to individually change instances of widgets.
    return Scaffold(
      appBar: AppBar(
        // Here we take the value from the MyHomePage object that was created by
        // the App.build method, and use it to set our appbar title.
        title: Text(widget.title),
      ),
      body: Center(
        // Center is a layout widget. It takes a single child and positions it
        // in the middle of the parent.
        child: Column(
          // Column is also a layout widget. It takes a list of children and
          // arranges them vertically. By default, it sizes itself to fit its
          // children horizontally, and tries to be as tall as its parent.
          //
          // Invoke "debug painting" (press "p" in the console, choose the
          // "Toggle Debug Paint" action from the Flutter Inspector in Android
          // Studio, or the "Toggle Debug Paint" command in Visual Studio Code)
          // to see the wireframe for each widget.
          //
          // Column has various properties to control how it sizes itself and
          // how it positions its children. Here we use mainAxisAlignment to
          // center the children vertically; the main axis here is the vertical
          // axis because Columns are vertical (the cross axis would be
          // horizontal).
          mainAxisAlignment: MainAxisAlignment.center,
          children: <Widget>[
            Container(               // <== TextWidget を修正
              width: 300.0, height: 50.0,
              child: Text( ErrorMessage ),
            ),
            /*        // <== この TextWidget はコメントアウト
            Text(
              '$_counter',
              style: Theme.of(context).textTheme.headline4,
            ),
            */
            Container(          // <== この後の Widgets は追加
              width: 300.0, height: 50.0,
              child: new TextField(
                enabled: true, maxLength: 50, style: TextStyle(color: Colors.black),
                obscureText: false, maxLines:1 ,
                onChanged: (String value){
                  USER_ID = value;
                },
                decoration: const InputDecoration(
                  icon: Icon(Icons.face),
                  hintText: 'メールアドレスを入力してください。',
                  labelText: 'e-mail address:',
                ),
              ),
            ),
            Container(
              width: 300.0, height: 50.0,
              child: new TextField(
                enabled: true, maxLength: 20, style: TextStyle(color: Colors.black),
                obscureText: true, maxLines:1,
                onChanged: (String value){
                  PASS = value;
                },
                decoration: const InputDecoration(
                  icon: Icon(Icons.lock_open),
                  hintText: 'パスワードを入力してください。',
                  labelText: 'passowrd:',
                ),
              ),
            ),
            Center(
              child: ElevatedButton(
                child: Text('Login'),
                onPressed: () async {
                  try {
                    final result = await auth.signInWithEmailAndPassword(email: USER_ID,password: PASS);

                    setState(() {
                      ErrorMessage = "ログイン成功";
                    });

                  } catch (e) {
                    setState(() {
                      ErrorMessage = "ログインできません。";
                    });
                  }
                }
              )
            )
          ],
        ),
      ),
    );
  }
}
簡単に説明すると、まず、Firebase にログインするために必要な dart ファイル 2つを import します。import とは、英語の意味の通り、プログラムを読み込んでくると言う意味です。
import 'package:firebase_core/firebase_core.dart';
import 'package:firebase_auth/firebase_auth.dart';
次に、FIrebase のインスタンスを作成しています。インスタンスとは、実体といった意味ですが、プログラムをメモリに読み込んできて、使える状態にすると言う意味です。
final FirebaseAuth auth = FirebaseAuth.instance;
そして、main() 関数から 2つのAPI を呼び出していますが、これは Firebase を使用する為の初期化(initialize)関数です。言い換えると、Firebase を使うための初期設定です。
void main() async{

  WidgetsFlutterBinding.ensureInitialized();
  await Firebase.initializeApp();

  runApp(MyApp());
}
main() 関数の最初の行に "async" と言う表記がありますが、これは、直ぐ下にある "await" と組み合わせて使う機能です。英語の asynchronize と await そのままの意味ですが、この大かっこの中は「非同期」処理であること、そして await のところは処理が終わるのを「待つ」という事になります。ですから、await の所の初期化処理が終わってから、runApp() つまり、プログラムを開始します。
次に、プログラムのタイトルを、ちょこちょこっと変更しています。
Widget build(BuildContext context) {
  return MaterialApp(
    title: 'login',
    theme: ThemeData(
      // This is the theme of your application.
      //
      // Try running your application with "flutter run". You'll see the
      // application has a blue toolbar. Then, without quitting the app, try
      // changing the primarySwatch below to Colors.green and then invoke
      // "hot reload" (press "r" in the console where you ran "flutter run",
      // or simply save your changes to "hot reload" in a Flutter IDE).
      // Notice that the counter didn't reset back to zero; the application
      // is not restarted.
      primarySwatch: Colors.blue,
    ),
    home: MyHomePage(title: 'Login'),
  );
}
_MyHomePageState Class の最初では、ログインに使用する文字列変数を 3つ宣言しています。これらも呼んで字のごとくです。
String USER_ID;
String PASS;
String ErrorMessage = "ログインして下さい。";
後は、エラーメッセージを表示する為に既存の Text Widget を修正・コメントアウトし、ID、Password 用に TextField Widget を 2つと、ログイン実行用に ElevatedButton Widget を追加しています。これらは、「第二回 Widget を試してみよう!」を参照しながら、上記 main.dart のソースコードを直接参照してみて下さい。
ElevatedButton では、"onPressed" の処理(ボタンが押された時)に、ログイン用 API である signInWithEmailAndPassword() を呼び出しています。これは、冒頭で作成したインスタンス FirebaseAuth.instance の機能なので、auth.sign... と記述されています。
onPressed: () async {
  try {
    final result = await auth.signInWithEmailAndPassword(email: USER_ID,password: PASS);

    setState(() {
      ErrorMessage = "ログイン成功";
    });

  } catch (e) {
    setState(() {
      ErrorMessage = "ログインできません。";
    });
  }
}
ID と Password を引数に指定して呼び出しているだけですから、特に難しいことはありません。 "async" と "await" は、先に説明したのと同じく、処理が終わるのを待ってから、次の処理に移ることを意味しています。"try" と "catch" についてですが、これは例外処理と言って、エラーが発生した時にどうするかを指定しています。つまり、"try" の大かっこで囲まれた中の処理で、エラーが発生した時には、"catch" の大かっこで囲まれた処理を行います。ここでは、「ログインできません」というメッセージを ErrorMessage 変数にセットします。
setState() ですが、これは、Flutter でのフレームワーク(決められた書き方)の一つで、この中での処理が実行されたら、Widget などを実行後の新しい値で更新することを意味しています。setState() の中で更新しなければ、変更内容は直ぐに反映されません。
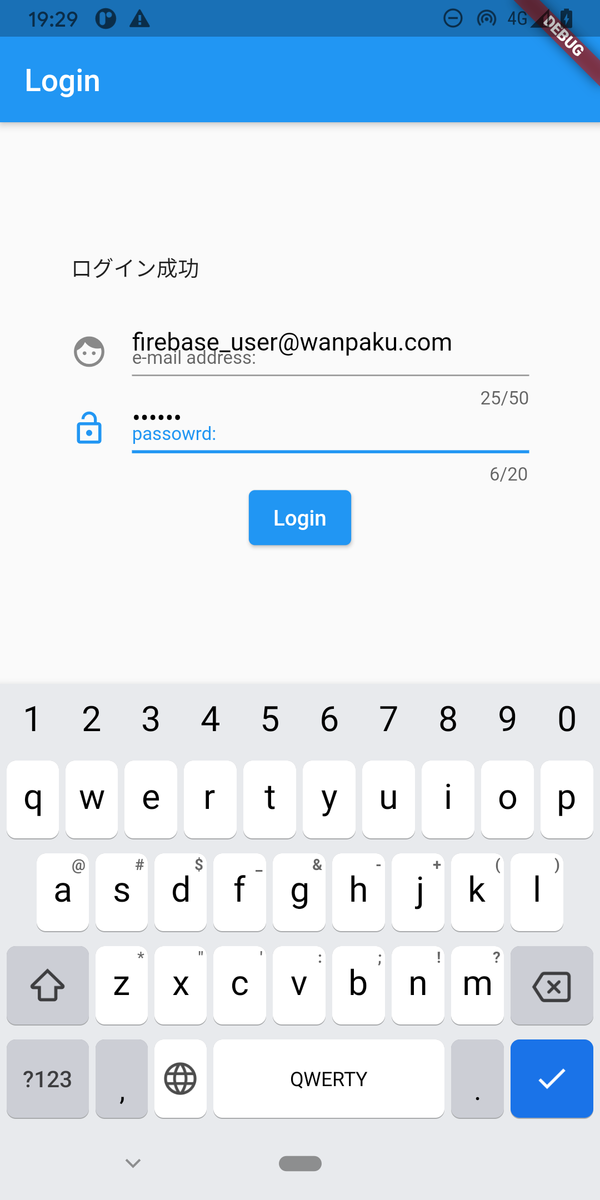
では、実行してみましょう。

正しく動作しているようでしたら、最初に設定したメールアドレスとパスワードを入力して "login" ボタンを押すとログイン処理が実行されます。
もしかすると、最初はなかなか上手く動かないかもしれません。何か間違いがないか根気強く確認してみて下さい。結構、ちょっとしたミスでエラーになっています。build.grade に設定したパッケージ名は、Firebase の設定と同じになっているでしょうか。google-service.json は、app レベルのディレクトリに保存してあるでしょうか。
以上